Identifying Mold vs Kahm Yeast in Ferments: A UK Guide
That moment when you crack open a fermenting jar and see a mysterious white film staring back at you? It’s enough to make your heart sink and wonder if you’ve just binned a week’s worth of effort. Trust me, I’ve been there. The good news is, that panic is usually unnecessary. Most of the time, it’s just harmless Kahm yeast, but knowing the difference from dangerous mould is crucial for keeping your ferments safe and delicious.
(If you’re still unsure about the basics of fermenting, check out our guide on How to Ferment Vegetables.)
The “Texture & Colour Cheat Sheet” (Visual Comparison)
| Feature | Kahm Yeast | Mould |
|---|---|---|
| Colour | White, creamy, ivory, sometimes pale pink | Green, blue, black, red, orange, sometimes fuzzy white |
| Texture | Powdery, dry, slightly bubbly or film‑like; may look like a thin crust | Fluffy, fuzzy, or slimy; often looks like a patch of hair or gelatin |
| Smell | Yeasty, bready, a faint “beer” note | Musty, sour, sometimes “wet cardboard” or outright rancid |
| Risk | Harmless, doesn’t affect safety or flavour (though it can be removed) | Potentially harmful – spores can penetrate the vegetables |
The honest answer is: if the growth is white, dry and smells yeasty, you’re looking at Kahm yeast. If it’s any other colour, feels fuzzy or slimy, and gives off a musty odour, it’s mould and it’s time to bin the batch.
A quick “smell test” often settles the debate faster than a microscope. In a typical British summer, the higher humidity in most kitchens makes Kahm yeast a frequent visitor – especially in jars that sit on the kitchen bench rather than in a cool larder.
(For a deeper safety rundown, see our Fermentation Safety 101.)
What Exactly is Kahm Yeast?
Kahm yeast is a harmless wild yeast that often appears as a thin, white film on the surface of your ferments, thriving in the same salty environment as the beneficial lactic acid bacteria. It hitch-hikes from the air and settles on the surface of your ferment when the brine isn’t quite deep enough or the temperature drifts up a few degrees. It never really harms the vegetables or your health.
Why it shows up
- Temperature spikes – a kitchen that warms above 22 °C (common when a kettle’s left on) encourages yeast growth.
- Insufficient brine – if the cabbage or carrots aren’t fully submerged, the exposed bits become a breeding ground.
- Weak salt concentration – less than 2 % (by weight) can let yeast outcompete the good bacteria.
The “Scrape Test”
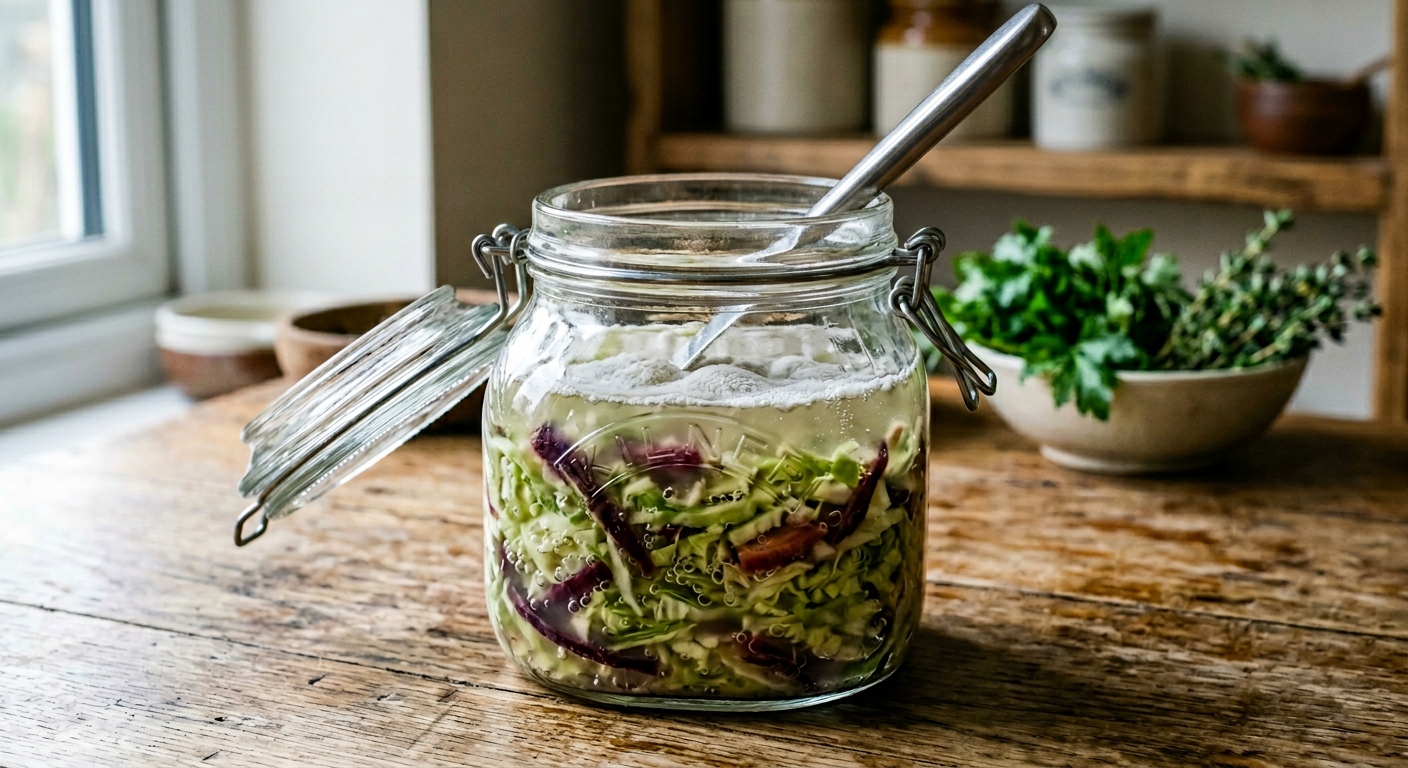
- Gather a clean spoon (I always use a stainless steel butter knife; it fits my 500 ml Kilner jars perfectly).
- Gently lift the white film – you should see a clean layer underneath.
- Discard the film – don’t stir it back in.
- Check the brine – if the vegetables are still fully under the liquid, the batch is fine.
I learned this the hard way when I once mistook a thick Kahm layer for mould, tossed a whole jar of carrot kimchi, and then realised I’d just thrown away perfectly good veg. The next batch I simply scraped it off, and the flavour was unchanged. If you want to know more about my journey into fermenting, you can read my story here.
(Want to see which jars make scraping easiest? My favourite is the classic Kilner fermenter – read more in Best Jars for Fermentation.)
How Do You Identify Mould in Ferments (And Why It’s Dangerous)?
Unlike Kahm yeast, mould is a fungus that can be harmful, often appearing in distinct colours and fuzzy textures, and it indicates that your entire batch should be discarded. Mould can infiltrate the vegetable fibres, producing spores that may carry mycotoxins. Unlike Kahm, it’s not content to sit on the surface – it can grow into the core of your veg. For official guidance on food safety, the Food Standards Agency (FSA) provides clear advice on how to handle mouldy food.
Colours to watch
- Green or blue – the classic “penicillium” look.
- Black – often a sign of a more aggressive species.
- Red or orange – less common but still unsafe.
Textures that signal trouble
- Fluffy, hairy patches – think of the “fuzz” on an old loaf of bread.
- Slimy, gelatinous blobs – a wet, shiny film that spreads.
The Penetration Test
Cut a single leaf or slice through the centre of the vegetable. If you see any of the above colours beneath the surface, the whole jar should be discarded. Mould spores can travel through the brine, so even a small patch can mean the whole batch is compromised.
A reader from Manchester wrote that their fridge was set to 7 °C during a heatwave, and a batch of sauerkraut developed black specks after just four days. The lesson? UK fridges that run a touch warm can accelerate mould growth – aim for 4–5 °C for long‑term storage.
(For storage tips, see our guide on How to Store Ferments.)
How Can I Prevent Mould and Kahm Yeast in My Ferments?
Preventing unwanted growths like mould and Kahm yeast primarily comes down to meticulous hygiene, maintaining proper brine levels, and controlling the temperature of your fermenting environment. The best defence is a good set‑up. Here’s a quick checklist you can tape to the front of your fermentation shelf:
- Use an airlock – a water‑lock on a Kilner Fermentation Jar keeps oxygen out while letting gases escape. I’ve found the small rubber valve on the Kilner set to be spot on for weekly batches.
- Keep vegetables fully submerged – a weight (clean stone, glass fermentation weight, or even a small zip‑lock bag filled with brine) stops surface blooms.
- Control temperature – store jars in a cool, dark cupboard or the lower part of the fridge. In winter, a pantry at 15 °C works fine; in summer, aim for 18 °C or lower.
- Clean tools thoroughly – rinse jars, lids and weights in hot water (no soap needed) and dry them completely before each use.
- Check the brine concentration – roughly 2 % salt (about 20 g per litre of water) is a safe baseline.
Budget‑friendly alternative
If you’re not ready to splurge on a full Kilner set (which runs roughly £15–£25 for a basic jar), the plastic fermentation bucket with an airlock is a decent starter – you can find one for around £12–£18. It’s a bit of a faff to clean, and the plastic can get a slight odour over time, but it does the job of keeping air out and brine in.
I tried the bucket on a batch of beet kvass last autumn; the first few days were a bit “mucky” as the plastic released a faint smell, but once the brine settled the flavour was fine and the bucket held up for three months of use.
Now you know what to look for – Download the Free Fermentation Starter Checklist to make sure every jar you open is safe and tasty.
Frequently Asked Questions
Can I scrape mould off my sauerkraut?
No. If you spot any coloured mould, the safest move is to discard the whole batch. Mould spores can penetrate deep into the vegetables, and scraping only removes the visible surface. It’s simply not worth the risk.
Does Kahm yeast make you sick?
Generally, no. Kahm is just wild yeast and doesn’t produce toxins. It may look a bit odd, but it won’t harm a healthy adult. If you’re immunocompromised, you might prefer to avoid it, though.
Can I eat the vegetables under the mould?
No. Even if the mould looks confined to the top layer, its spores can have spread through the brine and into the veg below. It’s not worth the risk of food poisoning – bin the whole thing.
Why is there white stuff on my ferment?
Most of the time it’s Kahm yeast – a harmless bloom that forms when the surface isn’t fully covered in brine or the temperature nudges up. A quick scrape and a check that everything stays submerged will sort it.
Why is my ferment slimy?
Sliminess can result from excess moisture, a weak salt balance, or the growth of undesirable bacteria. If the smell is off‑putting, it’s safest to bin it. If it still smells fresh, you might just have a texture you don’t enjoy – give it a taste test before deciding.
Where to Go From Here
You’ve now got the colour‑and‑texture cheat sheet in your back pocket, know how to test and remove Kahm yeast, and understand why mould means “bin it”. The next step is simple: make sure every jar you open follows the checklist above, and keep a watchful eye on the surface during the first few days.
If you want a printable reference to keep on your kitchen wall, download the Free Fermentation Starter Checklist – it walks you through brine ratios, weight placement, temperature tips and the exact signs to look for. For more tips and ideas, have a browse through the rest of the blog.
Got a lingering question or a weird growth you can’t identify? Drop me a line on the contact page and we’ll sort it together. Happy fermenting, and may your jars stay clear, crisp and under‑the‑radar.
— Maya
Related Guides
For a complete overview, see our Troubleshooting Common Fermentation Problems UK.
Sources & Further Reading
- Food Standards Agency (FSA) - Moulds and Food Safety
- National Centre for Biotechnology Information (NCBI) - Fermentation and Food Preservation
- Royal Society of Chemistry - Food Chemistry and Safety
Note: This guide provides general information based on common practices. Always verify details with a qualified professional or official source.