Quick Fermented Relish & Chutney Recipes UK
As an Amazon Associate I earn from qualifying purchases. This page contains affiliate links — if you buy through them, I earn a small commission at no extra cost to you.
You’ve probably looked at a jar of kimchi and wished for that tangy punch without the week-long wait. Good news: you can absolutely whip up flavour-packed fermented relishes and chutneys in just 24-48 hours. I’ll show you how to use a simple salt-brine method to create five UK-inspired condiments, ready for your fish cakes or cheese board, without a hitch.
The “Quick Fermentation” Method (Salt Brining)
Quick fermentation is a salt-brining process that takes 24–48 hours, using 2% salt by weight, keeping vegetables submerged, and then refrigerating. In other words, you’re creating an environment where the naturally occurring lactobacilli can flourish while the unwanted microbes are kept at bay. The salt draws water out of the veg, forming a brine that acts as a protective blanket. Within a day or two those friendly bacteria start converting sugars into lactic acid, giving you that tangy bite and a modest probiotic boost.
Salt Ratio Cheat Sheet – For a true “quick” ferment, stick to roughly 2% salt (20g of salt per kilogram of vegetables). Weigh both veg and salt on a digital scale; guessing will either make the brine too salty or too thin, and the latter can invite mould.
The timeline is simple:
- Slice, shred or chop your veg. The smaller the pieces, the faster the brine forms.
- Toss with salt and let it sit for 10-15 minutes. You’ll see water pooling at the bottom.
- Pack tightly into a clean jar, pressing down until the brine rises to cover the veg. If it doesn’t, add a little filtered water (no chlorine) to top it up.
- Weight it down – a clean stone, a fermentation weight, or even a small zip-lock bag filled with brine works. The rule is: under the brine at all times.
- Seal loosely (or use a fermentation lid) and leave at room temperature, ideally 15-20 °C. In the UK winter you might need a warm spot on the fridge top.
- Taste after 24 hours; if the flavour is sharp enough, pop the jar into the fridge to slow the process. If you prefer a deeper tang, let it sit another 12-24 hours.
Why it’s safe – Non-iodised sea salt (Maldon flakes or fine pink Himalayan) contains no anti-caking agents that could inhibit the bacteria. The acidity that builds up (pH < 4.5) makes the environment hostile to pathogens. As long as you keep everything clean, under the brine, and refrigerate once you’re happy with the taste, you’re good to go. For more detailed food safety information on fermented foods, the Food Standards Agency (FSA) has some useful guidance.
Quick tip: If you’re unsure about the salt amount, weigh your veg, multiply by 0.02 and you’ve got the exact grams of salt you need. No more “a pinch” guessing.
Essential Equipment for Quick Fermentation
You don’t need a full-blown laboratory, but a few reliable tools make the difference between a smooth ferment and a mouldy disappointment.
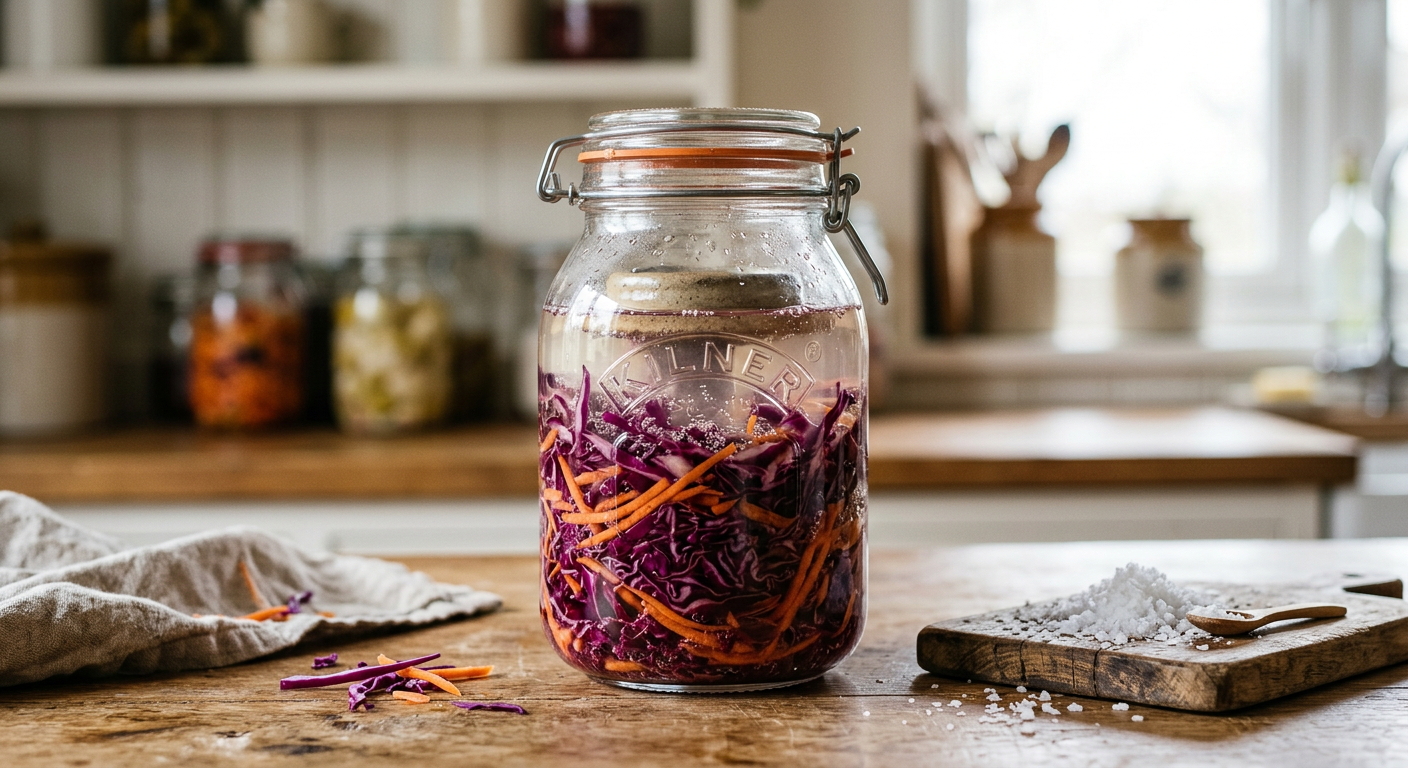
- The Jar – I swear by the Kilner Fermentation Jar Set (paid link) (roughly £15–£25). The rubber seal and airlock keep oxygen out while letting CO₂ escape, which means fewer bursts of pressure. If you prefer a glass-on-glass look, the Weck Tulip Jar (paid link) (around £20) is spot-on, though the clips can be fiddly in a cramped cupboard.
- The Weight – The Masontops Pickle Pebble (paid link) (about £8) sits at the bottom of the jar and stays put even when the brine sloshes around. I once tried a makeshift weight of a clean stone and it rolled out, leaving a patch of exposed veg that went mouldy. Lesson learned: a proper weight is worth the few quid.
- The Scale – Accuracy matters. My Salter Arc digital kitchen scale (≈£12) lets me hit that 2% salt ratio every time. A cheap kitchen balance can be off by a gram or two, and that’s enough to tip the brine balance.
- Budget Alternative – If you’re skint, the IKEA KORKEN jar (roughly £3-£5 each) will hold the ferment, but the lid’s rubber seal isn’t as airtight, so you’ll need to burp the jar more often. It’s a workable stop-gap for the first few batches.
Having the right equipment is non-negotiable for safety: an airtight seal prevents unwanted microbes, a weight keeps everything under the brine, and a scale guarantees the correct salt concentration.
Now that you know what you need, you’re ready to start.
Mid-article CTA: Want to be absolutely sure you’ve got the right salt and jars before you begin? Download the Free Fermentation Starter Checklist and tick off each item with confidence.
Recipe 1: Classic Cucumber & Dill Relish (The “Speedy” Version)
A crisp, tangy relish that works on a ploughman’s cheese board or as a topping for a hot dog.
Ingredients (makes one 750 ml jar)
- 2 large English cucumbers, thinly sliced
- 1 handful fresh dill, roughly chopped
- 2 cloves garlic, minced
- ½ small red onion, thinly sliced
- 20 g non-iodised sea salt (≈2% of veg weight)
- Filtered water to top up if needed
Method
- Toss the cucumber, dill, garlic, and onion with the salt in a large bowl. Let sit 10 minutes; you’ll see a clear brine form.
- Transfer the mixture to a sterilised Kilner jar, pressing down firmly with a butter knife so the brine rises above the veg.
- Add a weight to keep everything submerged, seal the lid loosely, and leave at room temperature for 24 hours.
- After a day, give it a quick taste. If the flavour is bright enough, tighten the lid and pop the jar into the fridge. It will keep for up to two weeks.
Why it works – Cucumbers are high in water content, so the brine forms instantly. This is the perfect “first ferment” recipe because the texture stays firm and the flavour develops fast.
Recipe 2: Spicy Apple & Ginger Chutney (UK Seasonal)
A sweet-heat chutney that pairs beautifully with a slice of mature cheddar or a roast pork shoulder.
Ingredients
- 2 medium Bramley apples, peeled and diced
- 1 carrot, grated
- 1 thumb-sized piece fresh ginger, finely chopped
- 1 red chilli, sliced (adjust to taste)
- 15 g non-iodised sea salt
- 30 ml filtered water (optional, if the mix is dry)
Method
- Combine apple, carrot, ginger, chilli, and salt in a bowl. The ginger releases moisture; give it a 10-minute rest.
- Pack the mixture tightly into a Weck jar, pressing until the brine covers the fruit. If the brine looks thin, add a splash of water.
- Seal with the rubber lid, place a Pickle Pebble weight, and set the jar on the kitchen bench for 36 hours.
- Taste; the apple should be soft but still hold a bite, and the heat should be noticeable but not overwhelming. Refrigerate thereafter.
Pro tip: The sweetness of the apple balances the chilli’s heat, making this a versatile condiment for both cheese boards and savoury pies.
Recipe 3: Beetroot & Carrot “Chutney” (The “Sweet & Savoury” Option)
A jewel-toned spread that looks as impressive as it tastes.
Ingredients
- 2 medium beetroot, peeled and grated
- 2 large carrots, grated
- 2 cloves garlic, minced
- 1 tbsp apple cider vinegar (optional, for a sharper edge)
- 18 g non-iodised sea salt
Method
- Mix the grated beets, carrots, and garlic with the salt. The salt draws out the beet’s vivid juice, creating a deep pink brine.
- Pack the mixture into a Kilner jar, ensuring the brine fully covers the veg. Add a weight and seal.
- Leave at room temperature for 48 hours, stirring once halfway through to redistribute the brine.
- When the colour is deep and the flavour is tangy with a hint of earth, refrigerate. It lasts for about ten days.
What I learned the hard way: I once added too much vinegar, thinking it’d speed up the tang. The brine became overly acidic and the vegetables turned mushy. Stick to the salt ratio and add vinegar only if you want a subtle lift.
Recipe 4: Radish & Garlic “Chutney” (The “Zesty” Option)
A peppery kick that livens up burgers, tacos, or a simple buttered scone.
Ingredients
- 250 g radishes, thinly sliced
- 2 cloves garlic, thinly sliced
- 1 handful fresh dill, chopped
- 15 g non-iodised sea salt
Method
- Toss radish, garlic, and dill with salt in a bowl; let sit 10 minutes.
- Pack tightly into a Weck jar, press down until the brine rises. Add a weight.
- Ferment at room temperature for 24 hours. The radishes should soften slightly but retain a crunch.
- Taste; if the bite is sharp enough, seal and refrigerate. Use within a week for the best snap.
Why radishes? Their natural pepperiness intensifies during fermentation, giving you a zesty condiment without any extra chilli.
Recipe 5: Mixed Berry & Vinegar Ferment (The “Sweet” Option)
A bright, slightly tart spread that works as a dessert topping or a yoghurt swirl.
Ingredients
- 300 g mixed berries (raspberries, blackberries, blueberries)
- 1 tbsp elderflower cordial (optional, for a floral note)
- 12 g non-iodised sea salt
Method
- Gently mash the berries in a bowl, then stir in the salt (and elderflower cordial if using). The salt will draw out juice, forming a natural brine.
- Transfer the mash to a Kilner jar, ensuring the liquid covers the fruit. Add a small weight – a clean glass marble works well.
- Ferment at room temperature for 36 hours. You’ll notice a gentle fizz and a pleasant sour scent.
- Once the flavour is tangy with a hint of sweetness, refrigerate. It’ll keep for about five days and is brilliant over vanilla ice-cream or stirred into Greek yoghurt.
Fun fact: Berries ferment quickly because they’re already high in sugars, which the lactobacilli love. The result is a sweet-tangy profile that’s far more complex than a simple jam.
Troubleshooting & Safety Tips
Fermentation is forgiving, but a few basics keep you from a batch gone to pot.
- What to look for: Bubbles rising through the brine, a pleasantly sour aroma, and a slightly softer texture are all good signs.
- What to avoid: Any white, fuzzy mould on the surface, a slimy film, or a rotten-egg smell means the batch is ruined – the honest answer is, throw it out.
- Kahm yeast: This harmless, crusty film can appear on top of the brine. It’s not dangerous, but it looks unsightly. Simply skim it off with a clean spoon; the ferment underneath remains fine.
- When to toss: Use this quick checklist – if you see mould, a foul odour, or the brine has turned completely clear with no acidity, discard the jar. Trust your nose; if it smells off, it’s off.
Refrigerator Rule: Once you’re happy with the flavour, seal the jar tightly and store it in the fridge. The cold slows the bacteria, preserving the taste for up to two weeks (or longer for the beet-carrot mix).
Safety note: Properly brined, lacto-fermented veg are low-risk for food-borne illness. The real danger lies in mis-canning low-acid foods, which is a different process altogether. You can find more information on safe food practices on the FSA website.
Quick Fermentation Salt Ratios
| Vegetable Type | Salt Amount (g) | Fermentation Time | Texture Result |
|---|---|---|---|
| Cucumber | 20g per kg | 24 hours | Firm and crisp |
| Apple & Ginger | 15g per kg | 36 hours | Soft but holding bite |
| Beetroot & Carrot | 18g per kg | 48 hours | Soft and earthy |
| Radish | 15g per kg | 24 hours | Slightly softened crunch |
| Mixed Berries | 12g per kg | 36 hours | Soft and sweet-tart |
Note: Use non-iodised sea salt for best results.

Where to Go From Here
Quick fermentation gives you a flavour-packed, gut-friendly condiment without the marathon simmer. You’ve got five versatile recipes that fit into a busy week, a clear method that’s safe and repeatable, and a shortlist of tools that keep the process tidy. Remember, the first jar is often a learning curve – you might over-salt or forget to weight the veg, but each mistake is a step toward a flawless batch. If you’re curious about my own fermentation journey, you can read more about me here.
If you’re ready to make sure you’ve got the right salt, jars, and weights before you start, grab our Free Fermentation Starter Checklist – it walks you through everything you need to have on hand, so you can skip the faff and get straight to the good stuff.
Happy fermenting, and may your jars be bubbling and your plates ever-more flavourful!
Related Guides
For a complete overview, see our UK Fermented Condiments & Creative Ways to Use Them.
Sources & Further Reading
- Food Standards Agency (FSA) - Guidance on fermented foods
- National Centre for Biotechnology Information (NCBI) - Lactic Acid Bacteria in Fermented Foods
- Royal Horticultural Society (RHS) - Vegetable Growing Advice
As an Amazon Associate I earn from qualifying purchases. The products linked above are ones I would use or recommend on my own camps.
Note: This information is for general guidance only. Always verify specific food safety guidelines and fermentation techniques with a qualified professional or official source.