pH Levels in Fermentation: The 4.6 Safety Rule Explained Simply
As an Amazon Associate I earn from qualifying purchases. This page contains affiliate links — if you buy through them, I earn a small commission at no extra cost to you.
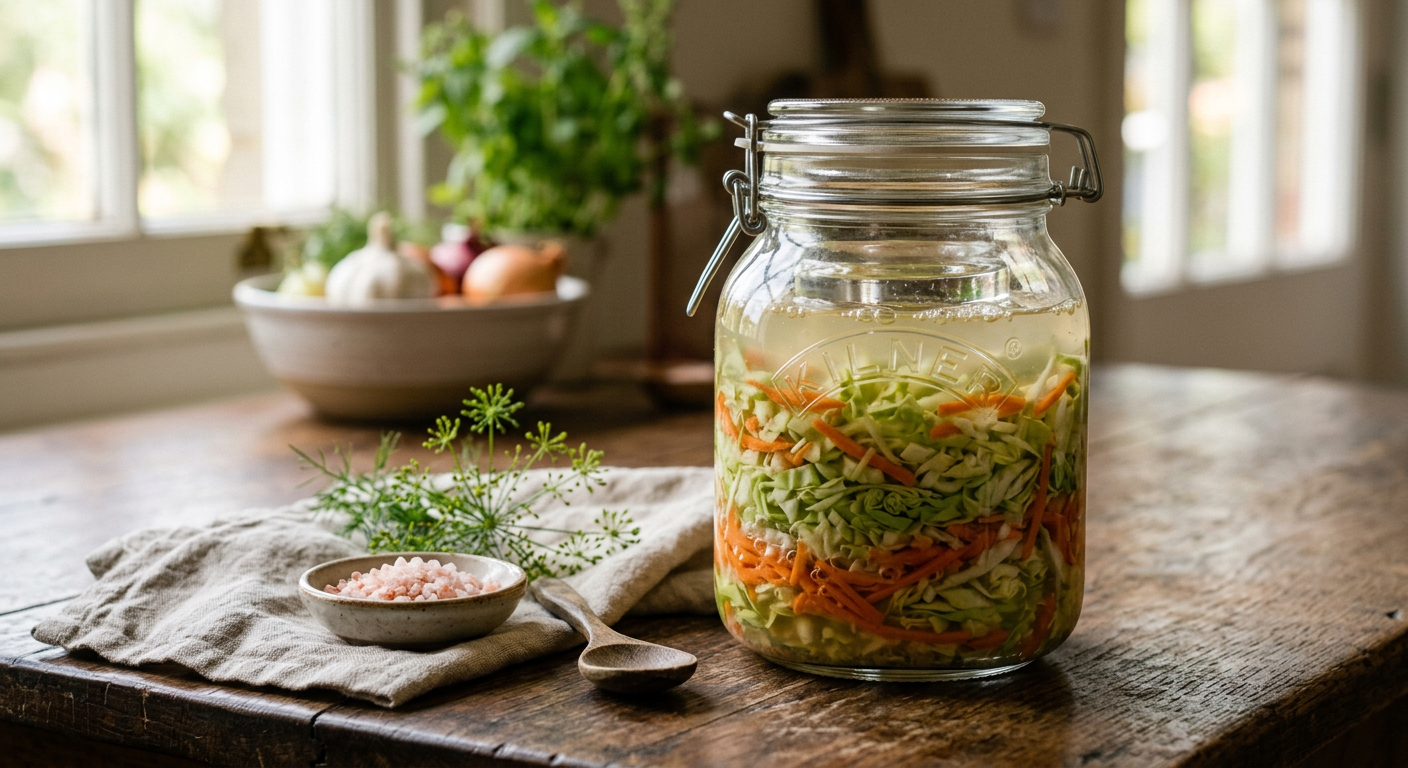
You open a jar of homemade pickles and spot a white film on the surface – the dreaded kahm yeast. Your excitement turns to doubt: “Did I mess up the acidity? Is this safe to eat?” You’re not alone. Many beginners hit that moment, wondering whether a sour smell means a tasty bite or a health hazard. In the next few minutes you’ll learn what pH really means for your jars, why the magic number 4.6 matters, and how to check it without turning your kitchen into a chemistry lab. By the end you’ll be able to spot a safe batch, measure it confidently, and keep your veg fermenting without the fear of botulism.
What is pH and Why Does It Matter?
pH is simply a scale that tells you how acidic or alkaline a solution is, ranging from 0 (very acidic) to 14 (very alkaline). Think of it as the “taste‑and‑safety meter” for your brine. A lemon’s juice sits around pH 2, tap water is about 7, and household washing up liquid can be up near 10. Vegetables sit somewhere in the middle when raw, but once you pack them under salt and let the lactic acid bacteria do their thing, the pH drops dramatically.
Why does that drop matter? In lacto‑fermentation the good bacteria convert sugars into lactic acid, which both gives the characteristic tang and creates an environment that stops harmful microbes from thriving. The “Vegetable Gap” is the fact that, unlike beer or wine where you aim for precise pH windows for flavour and alcohol, veg ferments only need to get acidic enough to keep the bad guys out. That cutoff is pH 4.6 – the point at which Clostridium botulinum can’t grow. Anything above that, and you’re leaving the door open for potential spoilage. The Food Standards Agency (FSA) provides general guidance on fermented foods, highlighting the importance of proper pH for safety.
A quick visual helps: imagine the scale as a ruler. From 7 (neutral) you move leftwards – 5 is mildly acidic (think black coffee), 4 is noticeably sour (like a ripe tomato), 3 is sharp (plain yoghurt). Your goal is to land somewhere between 3.5 and 4.0 for most veggies, comfortably below the 4.6 safety line.
The honest answer is, a lower pH makes a safer, tastier ferment, but you don’t need a PhD to hit it.
Is the 4.6 pH Threshold About Safety or Flavour?
The 4.6 figure is a hard safety limit, not a flavour target. If you measure a batch at exactly 4.6, it’s safe from botulism, but it may still taste a little bland. Most of us aim for a pH between 3.5 and 4.0 because that’s where the tang really sings. The sourness you associate with “proper” sauerkraut or pickles is precisely that extra acidity.
You might worry, “What if it’s too sour?” In practice, if the pH is below 3.5 you’ll notice a sharp bite that can feel “over‑soured”. That’s a flavour issue, not a safety one. Adjust by shortening the fermentation time or using a slightly lower salt percentage next batch. British cucumbers, especially the long‑shelf varieties you find in a supermarket, start at a higher natural pH than crisp Persian cucumbers, so they often need a few extra days to dip under 4.6. Think of 4.6 as the “door‑stop” – you must be past it, but the sweet spot for taste lies a little further down.
How Do I Measure pH: Strips or Meters?
You’ve got two main choices for checking your ferment’s acidity: simple pH strips or a more precise digital pH meter.
pH Strips – the beginner’s friend
pH strips are cheap (around £5–£8 for a pack of 100) and require no calibration. You dip a strip into a sample of brine, wait a few seconds, and compare the colour to a chart. They’re spot‑on for a quick sanity check – you’ll instantly see if you’re still above 5.0 and need more time. The downside is that the colour bands are broad; a strip might read 4.5 – 4.8 as “4.6”, which is fine for safety but not precise enough for fine‑tuning flavour.
pH Meters – the accurate but fiddly option
A digital pH meter gives you a single, precise number (e.g., 4.22). The Apera Instruments PH20 (paid link), which you can find for roughly £30–£45, is a solid mid‑range choice. It requires a calibration solution (usually two points, pH 4.0 and 7.0) before each use, and the electrode needs to stay wet. If you’re the sort who likes data, a meter is worth the hassle – you’ll know exactly when you’ve hit 4.0 and can stop the ferment at the perfect moment.
For those on a shoestring, the Dr. Meter PH838 offers a budget alternative at roughly £15–£20. It isn’t as solid as the Apera, and the probe can be a bit fragile, but it still reads within ±0.1 pH, which is plenty for home ferments.
Water quality matters
UK tap water often carries a low level of chlorine, which can suppress the lactic acid bacteria and give you a misleadingly high pH reading. I once used straight tap water for a cucumber brine, and the pH stayed stubbornly above 5.0 for days. Switching to filtered or boiled‑then‑cooled water dropped the pH to the safe zone within 48 hours. So, give your water a quick boil, let it cool, and you’ll avoid the “faff” of a stuck ferment.
If you want to know whether your veg ferment is safe, simply check that the pH reads below 4.6. Use a strip for a quick check, or a calibrated meter for precise control. If the reading is higher, keep the jar at a stable 15–20 °C, add a pinch more salt, and give it a few extra days. When the number finally drops under 4.6, you can be confident the environment is hostile to botulism and your flavours are developing as they should.
Target pH Ranges for Common UK Foods
Different vegetables start at different natural pH levels, so the time they need to reach the safety zone varies. Here’s a quick cheat‑sheet for the most popular UK ferments:
- Sauerkraut – aim for 3.5 – 4.0. Cabbage is naturally acidic, but the salt‑brine process usually takes 1–2 weeks at 18 °C.
- Pickled cucumbers – target 3.8 – 4.2. English cucumbers often need a slightly longer ferment than Persian varieties because they begin at a higher pH.
- Kimchi – safe range 4.0 – 4.5. The addition of chili, garlic, and fish sauce pushes the pH up a touch, so a longer ferment (3–5 days) is common.
- Kombucha – not a veg ferment, but worth noting: 2.5 – 3.0. The tea‑based culture is much more acidic, so it sits well below the 4.6 line.
If you’re unsure, a quick strip test after the first 48 hours will tell you whether you’re on track. Remember, the pH you see is the result of both the vegetables’ inherent acidity and the lactic acid produced.
Troubleshooting: What If My pH Is Too High?
A high pH usually shows up as a lack of tang, a soft texture, and sometimes a white, fluffy film (kahm yeast) rather than the glossy, clear brine you expect. If you dip a strip and it reads 5.2, you’ve got a batch that’s not yet safe.
What to do next?
- Don’t eat it – the honest answer is, if you’re unsure, bin it. There’s no point risking a stomach upset.
- Add more salt – a 2% increase (by weight of vegetables) can boost the osmotic pressure, encouraging the good bacteria to outcompete any spoilage microbes.
- Give it time – keep the jar at a stable 15–20 °C, burp it daily, and re‑test after 24 hours. Most batches drop a full pH point within a week if the conditions are right.
- Check your water – if you used heavily chlorinated tap water, switch to filtered water for the next batch; chlorine can inhibit the lactic cultures and keep the pH high.
If you ever see a foul odour (like rotten meat) or black mould, discard immediately. Those are clear signs the batch has gone off, regardless of pH.
Measuring pH: Strips vs. Meters (continued)
Now that you know what to do when the numbers are off, let’s talk tools again. The budget‑friendly route is to start with strips – they cost less than a night out and you can get a feel for how quickly your veg drops in acidity. Once you’ve nailed a few batches, you might consider splurging on a meter; the extra precision will let you experiment with lower salt levels or faster ferment times without compromising safety.
If you’re hunting for a reliable UK supplier, both the Apera and Dr. Meter models are stocked by Sous Chef and Steenbergs for roughly £30–£45 and £15–£20 respectively. For strips, The Spiceworks carries a pack of universal pH test strips for around £7. All of these options are “worth its salt” for a home fermenter who wants confidence without a laboratory. You can often find more in-depth reviews and comparisons of these tools on fermentation blogs and forums online.
Target pH Ranges for Common UK Foods (continued)
A quick tip from a reader in Manchester: they found that using a mandoline to shave carrots for a quick kimchi gave a finer texture, which in turn sped up acid production – their pH dropped much faster than usual. The tool itself isn’t essential, but the finer the chop, the faster the bacteria can access sugars, and the quicker you drop below 4.6. So, if you’re in a hurry, a simple slicer can be a real time‑saver.
Troubleshooting: What If My pH Is Too High? (continued)
One of my own “hit‑and‑miss” moments was when I tried fermenting a batch of beetroot with a very low salt level (1%). The pH lingered at 5.0 for a week, and the beet turned mushy rather than crisp. I learned the hard way that salt isn’t just for flavour; it’s the primary driver that creates the brine’s osmotic pressure and pushes the pH down. From then on, I never dip below 2% salt for root veg. If you’re curious about how I got into all this, you can read more about my fermentation journey here.
If you ever end up with a pH lower than 3.0, you’ve probably over‑fermented. The flavours become a sharp, almost vinegary bite. You can rescue it by rinsing the veg in fresh water and re‑packing them with a slightly higher salt brine, then letting them sit for a day or two to mellow.
Frequently Asked Questions
Do I really need a pH meter to ferment safely?
Not strictly. Traditional methods rely on the right amount of salt, time, and temperature to naturally bring the pH below 4.6. A meter just gives you peace of mind that you’ve hit the safety line – especially useful when you’re experimenting with new vegetables or lower‑salt recipes.
What pH is too low for fermentation?
Anything below 3.0 is extremely acidic and can make the final product taste aggressively sour or even “burn” the palate. Most veg ferments stop fermenting effectively around pH 3.0, so you won’t see further flavour development beyond that point.
Can I use tap water for my brine?
UK tap water often contains chlorine, which can kill the beneficial lactic bacteria and keep the pH stubbornly high. I recommend filtering or boiling the water, then letting it cool to room temperature before mixing your brine. It’s a tiny extra step that saves a lot of faff later.
How long does it take to reach pH 4.6?
It varies with the vegetable, salt level, and ambient temperature. Cucumbers might hit 4.6 in 2–3 days at 18 °C, while a full head of cabbage for sauerkraut can need 7–14 days. Warmer kitchens speed things up; cooler winter rooms slow things down.
Is pH the only thing that matters for safety?
No. Oxygen exposure, temperature stability, and overall sanitation are also crucial. Keep your jars sealed (or covered with a weight), store them at a consistent 15–20 °C, and always use clean equipment. pH is just one piece of the safety puzzle, but it’s the most measurable one.
pH Safety & Flavour Reference
| pH Range | Safety Status | Typical Flavour Profile |
|---|---|---|
| > 4.6 | Unsafe – risk of harmful bacteria | Flat, barely tangy |
| 4.6 – 4.0 | Safe – lactic acid dominates | Pleasantly sour, good crunch |
| 3.5 – 4.0 | Safe – ideal for most veggies | Tangy, classic flavour |
| < 3.5 | Safe – very acidic | Sharp, may feel over-soured |

Where to Go From Here
You now have the basics: pH tells you whether your ferment is safe, the 4.6 threshold is the non‑negotiable floor, and you can check it with a cheap strip or a calibrated meter. Keep an eye on your brine’s colour, taste, and smell – they’ll often hint at the pH before you even test. When you’re ready to tighten up your process, grab our free Fermentation Starter Checklist – it walks you through everything from salt ratios to equipment calibration, so you never have to guess again.
If you’ve just read through and feel confident about measuring and adjusting pH, go ahead and Download the Free Fermentation Starter Checklist. It’s the next logical step to turn theory into flawless jars, and it’ll keep you from repeating the mistakes I made on my first few batches. Happy fermenting, and may your brine stay safely sour!
Related Guides
For a complete overview, see our Troubleshooting Common Fermentation Problems UK.
Sources & Further Reading
- Food Standards Agency (FSA) - Guidance on fermented foods
- The Royal Horticultural Society (RHS) - Fermentation and preserving
- National Centre for Biotechnology Information (NCBI) - Lactic acid bacteria in food preservation
As an Amazon Associate I earn from qualifying purchases. The products linked above are ones I would use or recommend on my own camps.
Note: This information is for educational purposes only. Always verify specific safety guidelines and consult a qualified professional or official source for critical food safety decisions.