When is My Ferment Ready? Signs of Successful Fermentation
Three days in, and you’re staring at a cloudy jar, wondering if it’s alive or dead. It’s a familiar moment, but you don’t need a stopwatch or a chemistry set to know if your ferment is working. What matters are a handful of visual and sensory clues that tell you whether the bacteria are doing their thing or if something’s gone off-track. By the end of this, you’ll be able to spot the signs, skip the panic, and know exactly when to taste-test with confidence.
Now that you know what to look for, why not make it even easier? Download the Free Fermentation Starter Checklist – a printable you can tape to the fridge and tick off as you go.
The 5 Golden Signs Your Ferment is Working
To know if your batch is on the right track, look out for these key indicators:
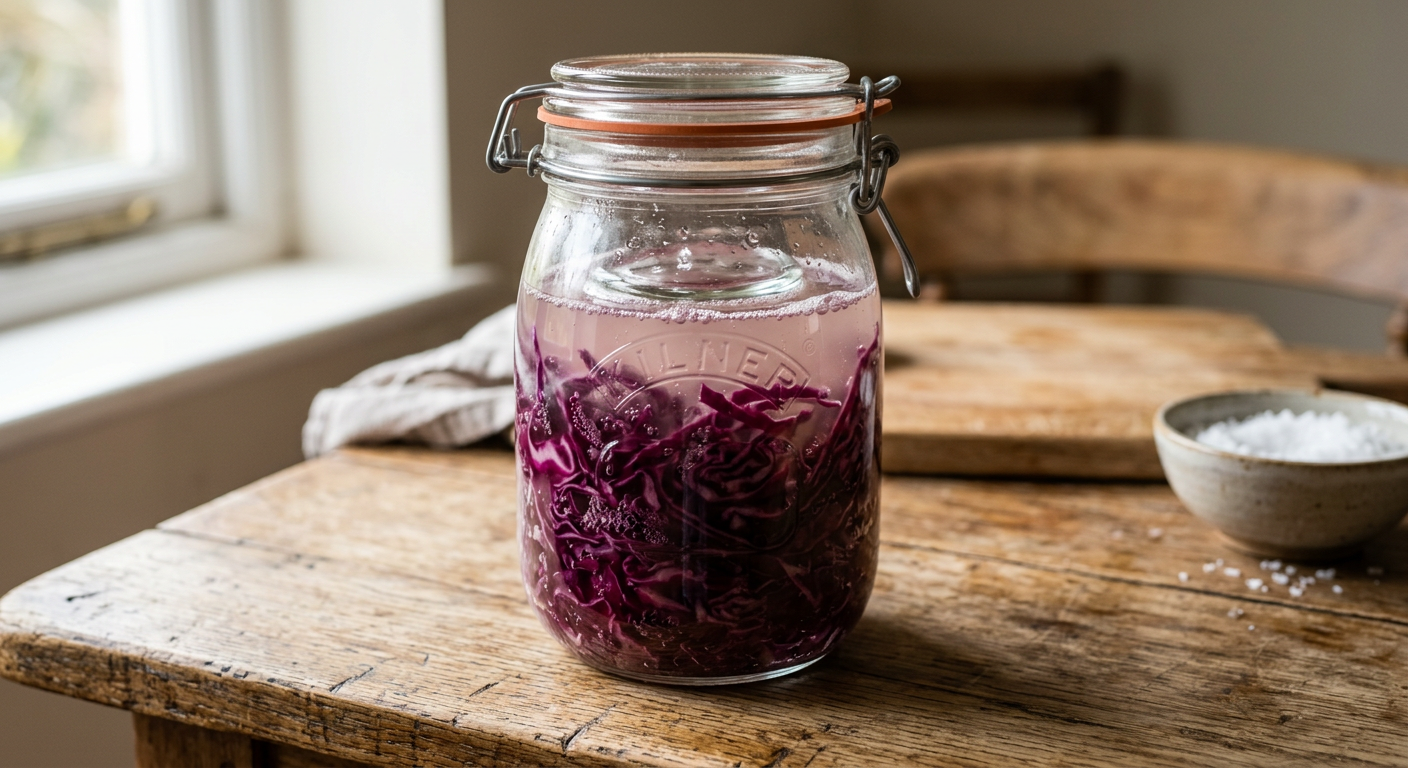
- Bubbles on the surface – Tiny, steady streams of bubbles rising through the brine mean lactic bacteria are producing carbon dioxide. If the bubbles have completely stopped after a week, the ferment may be winding down.
- Cloudy brine – A milky, slightly opaque liquid is a hallmark of an active culture. Clear brine usually signals that the microbes have stalled or that the jar isn’t sealed properly.
- Sour, tangy smell – Think sourdough starter or a well-aged pickle brine. The aroma should be pleasantly acidic, never putrid or reminiscent of rotten eggs.
- Texture change – The veg should soften just enough to be bite-able but still retain a faint crunch. If it turns mushy, you’ve probably over-fermented or the temperature is too high.
- Taste – A quick spoonful should hit the palate with a clean, tangy zing. No bitterness, no raw veg flavour – just that gentle lacto-acid punch.
| Good Signs | Bad Signs |
|---|---|
| Bubbles constantly rising | No bubbles for 10+ days |
| Milky, slightly opaque brine | Clear, watery brine |
| Fresh sour aroma (like sourdough) | Rotten, sulphur or ammonia smell |
| Veg still crisp-ish | Mushy, soggy veg |
| Tangy, clean taste | Bitter, off-flavour |
I learned this the hard way with my first sauerkraut. After a week the brine was crystal clear and the cabbage still smelled like raw veg – I’d forgotten to add enough sea salt. A quick top-up of a 2% salt solution revived the bubbles and the brine turned cloudy again. It’s a reminder that a tiny tweak can bring a stalled ferment back to life.
Is My Ferment Safe? What to Skim vs. What to Toss
Knowing whether to skim a harmless film or toss a whole batch is crucial. The key is to differentiate between kahm yeast, which is safe to remove, and mould, which signals spoilage and means the ferment should be discarded.
Scum (safe to skim) – A thin, white-to-grey film that sometimes forms on top is usually kahm yeast, a harmless by-product of the fermentation. Use a clean spoon to lift it off; the rest of the jar stays perfectly fine.
Mold (discard the batch) – Green, pink, black, or fuzzy patches are mould. Even a tiny speck means the whole jar should be thrown away – the toxins can spread beyond the visible growth, as advised by the Food Standards Agency (FSA).
Bad smells – A sulphur “rotten egg” odour or a sharp ammonia scent are reliable red flags. If the aroma deviates from the pleasant sour note, it’s safest to bin it.
Safety Warning: Never taste a ferment that shows any of the mould signs above. The risk isn’t worth a nibble.
A reader once emailed me after spotting a thin white layer on their kimchi. She was about to stir it back in, but I reminded her that kahm yeast is harmless and can be skimmed. She did, and the batch turned out brilliant – a classic case of “don’t panic, just skim”.
For a deeper dive into the science of kahm yeast and mould, see our Fermentation Safety Guide or learn more about my journey into fermenting.
Now you’ve sorted the safety side, you might want to Download the Free Fermentation Starter Checklist to log any foamy layers, smells, or texture changes as they happen.
How to Taste Test Safely (Without Contaminating the Batch)
When it’s time to check on your ferment, follow these simple steps to avoid introducing unwanted bacteria:
- Grab a clean, dry spoon – preferably one you’ve rinsed in boiling water and let dry.
- Dip once, taste, and set aside – don’t dip the same spoon back into the jar.
- If you need more, repeat with a fresh spoon – this prevents unwanted bacteria from the first sample re-entering the brine.
Think of it like dipping a crisp chip into a dip bowl; you wouldn’t dunk the same greasy chip back in, so don’t reuse a used spoon. This simple step aligns with general food hygiene best practices. A quick taste after a few days gives you the confidence to know whether the acidity is where you want it.
For a rundown of the essential gear (including a good fermentation weight and a non-metallic lid), check out our Essential Fermentation Equipment page.
UK Timing: Why It Depends on the Season and Veg
British vegetables change character throughout the year, and that affects how fast they ferment.
- Winter cabbages – denser, higher sugar content, and the cooler ambient temperature (around 12–14 °C) mean they often finish in 7–10 days.
- Summer cucumbers or carrots – higher water content and a kitchen that’s 20–22 °C can push the same process to 2–3 weeks.
- Red cabbage vs. white cabbage – the former holds more pigment and a bit more sugar, so it tends to develop a deeper colour and a slightly quicker tang.
A rule of thumb: 1 week per 10 °C of ambient temperature above 15 °C, adjusting for veg density. So if your kitchen sits at 18 °C in spring, expect a typical sauerkraut to be ready in about 10-14 days. In a chilly winter cupboard at 12 °C, give it 14-21 days.
I once tried fermenting a batch of spring lettuce in a chilly flat. After a long wait there was barely a bubble in sight and the leaves were still crisp. A quick move to a warmer cupboard jump-started the activity and the lettuce was ready after a few more days. Temperature really is the hidden lever.
For seasonal recipe ideas, see our Seasonal Fermentation Recipes.
Troubleshooting: What If It Smells Bad?
Trust your nose; it’s one of your best tools in fermentation.
- Rotten meat or egg smell? – This indicates spoilage. Toss the batch; the acids haven’t built up enough to suppress harmful microbes.
- Paint or chemical odour? – Often a sign of contaminated water or a cleaning product leaching into the brine. Rinse the jar, use filtered water, and start again.
- Sour-dough-like aroma? – That’s the sweet spot. Your lacto-bacteria are doing their job, and the ferment is ready to taste.
When to panic: If the smell is anything other than a clean, tangy sourness, it’s safer to discard. Trust your nose – if it would make you wince eating the raw veg, don’t eat it fermented.
For a full list of common mistakes, have a look at our Common Fermentation Mistakes guide.
Frequently Asked Questions
How long does sauerkraut take to ferment?
In the UK, sauerkraut typically needs 1–3 weeks to ferment, depending heavily on your kitchen’s ambient temperature. A warm, sunny kitchen (around 20 °C) will push it toward the one-week mark, while a cooler cupboard (12–14 °C) can stretch it to three weeks.
Is the white foam on top mold?
No, that fluffy white or grey layer is almost always kahm yeast – a harmless by-product of fermentation that you can simply skim off. If you spot green, blue, or fuzzy patches, that’s mould and the whole batch should be thrown away.
Can I eat my ferment if the brine is low?
Yes, as long as the vegetables remain fully submerged under the brine, they are fine. If any piece is exposed, it can develop surface mould. Top up with a little extra 2% salt solution to keep everything submerged.
Why is my ferment cloudy?
Cloudiness is actually a good sign, signalling that active bacteria are multiplying and doing their job. Clear brine usually means the fermentation has stalled, often because of insufficient salt or a too-cold environment.
Does temperature affect fermentation?
Absolutely, temperature significantly impacts fermentation speed and outcome. Keep jars out of direct sunlight and away from radiators. A cool, dark cupboard (15–18 °C) is ideal for most UK kitchens. Warmer spots speed things up; colder spots slow them down.
Fermentation Timing Guide
| Vegetable Type | Typical Fermentation Time | Key Factors |
|---|---|---|
| Winter Cabbage | 7–10 days | Denser, higher sugar content, cooler ambient temperature (12–14 °C) |
| Summer Cucumber | 2–3 weeks | Higher water content, warmer kitchen (20–22 °C) |
| Red Cabbage | Slightly quicker | Holds more pigment and sugar than white cabbage |
| Spring Lettuce | Variable | Sensitive to temperature; may need warmer spot to activate |
| General Rule | 1 week per 10 °C above 15 °C | Adjust for vegetable density and ambient conditions |

Where to Go From Here
You’ve now got the visual decoder, the safety checklist, and the timing guide to read your jar like a pro. The next step is simply to put that knowledge into practice and keep a record of each batch – that’s where the Free Fermentation Starter Checklist shines. It helps you note the day you packed, the temperature, any foam you skimmed, and the tasting date, so you never have to guess again. If you’re curious about other recipes or want to dive deeper into the world of live ferments, check out our blog for more ideas.
Fermentation isn’t rocket science; it’s a bit of a faff at first, but once you’ve seen the bubbles, the cloud, and the tang, you’ll feel the process is spot on. Keep an eye on the signs, trust your nose, and remember: a failed jar is just a learning curve, not a culinary disaster.
Download the Free Fermentation Starter Checklist, tag it to your fridge, and give yourself the confidence to let nature do its thing. Happy fermenting!
Related Guides
For a complete overview, see our Troubleshooting Common Fermentation Problems UK.
Sources & Further Reading
- Food Standards Agency (FSA) - Food Poisoning
- NHS - Food Safety and Hygiene Tips
- Real Food Magazine - Fermentation Guide
Note: This information is for general guidance only. Always verify details with a qualified professional or official source.